9/27/15

Recipe: Rustic Eggplant Parmesan


This is just the best time of year, isn’t it? The days are hot, the nights are cool, the sky is clear, and the light is sharp. But that’s not all! The peaches are juicy, the apples are crisp, the tomatoes are bursting, the corn is mouthwatering, and the winter squashes are starting to roll in. The Berkshires are at their most beautiful and bountiful. It’s overwhelming really — what does one do with this incredible cornucopia?

Matters are further complicated by the transition in the weather. The days are still too hot to be cooking over the stove, but the evenings are starting to be cool enough that you crave those slow roasted treats absent from plates since March. Not to mention, by this time of the year, you’re a little sick of that char-grilled flavor and you’ve consumed more sliced tomatoes then you thought was humanly possible.


We say, embrace the transition, the back and forth, the thin-line walking. Here’s how to do it: Rustic Eggplant Parmesan. This particular take on the classic Italian-American dish involves almost no prep and maybe even less time in the kitchen, but it still manages to shine with layered flavors of slow roasted tomatoes, earthy eggplant, and creamy melted cheese!

It is the best of both our worlds — hot sticky summer, and cool crisp autumn.

Rustic Eggplant Parmesan

+ 2 medium eggplant (about 2 lbs.) sliced into 1/4-inch-thick rounds
+ ¾ teaspoon kosher salt, more to taste
+ Freshly ground black pepper to taste
+ About ¾ cup extra virgin olive oil
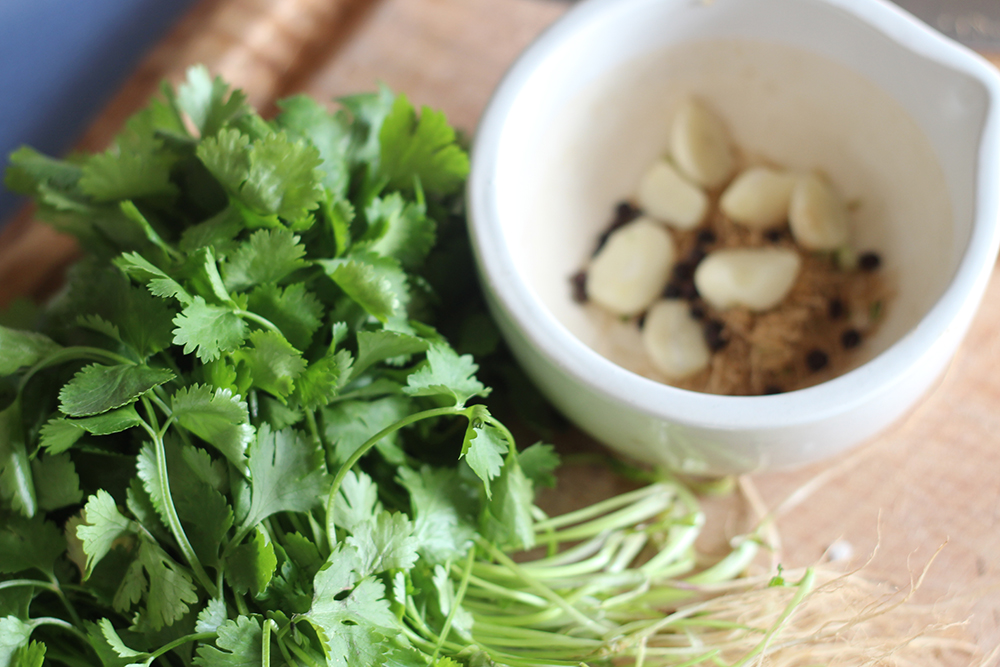
+ 1 head of garlic (6 large cloves) minced or pressed
+ 6 medium tomatoes sliced into 1/4-inch-thick rounds
+ ½ cup finely grated Parmesan
+ 1 lb. fresh mozzarella, sliced into 1/4-inch-thick rounds
+ Handful of basil, chopped if you prefer

1. Place the eggplant slices in a colander over a bowl. Season with 1/2 teaspoon salt and let stand for 20 minutes. Drain and pat slices dry with a paper towel. Season with pepper.
2. Preheat oven to 375 degrees. In a large (9” x 13” works) baking pan, place a single layer of sliced tomatoes, then a single layer of eggplant. Sprinkle with a light coating of olive oil, garlic, and Parmesan cheese.
3. Repeat layering one more time and top with an additional single layer of tomato. Dust with salt and Parmesan.
4. Place in oven. After a half hour, remove pan from oven and cover the dish with the mozzarella, remaining Parmesan cheese, olive oil and salt.
5. Return to oven and cook for another half hour. Serve hot with basil and black pepper sprinkled on top.

Note: This recipe originally appeared on RuralIntelligence.com on September 7, 2015. 

8/10/15

Recipe: Cornbread Panzanella Salad


Few things hit the spot like a great salad on a hot August day. One of our favorite summer salads has already been perfected by not one, but two chefs in Great Barrington — Daire Rooney of the Mezze Restaurant Group and Steve Browning at Prairie Whale. They have different approaches to the dish, but our reaction is always the same; when we see a panzanella salad on either of their menus, we just have to order it.

But sometimes you just want to stay in and make your own, right? Luckily, with panzanella, you can’t go wrong. Just grab a few fresh ingredients, throw ‘em together and you’ve got a bright and satisfying classic summer side dish.


This salad is simple, but also highly adaptable. Don’t like cucumbers? Leave them out. Have some beautiful sweet peppers? Toss them in. Whether you’re picnicking at Tanglewood, dropping by a summer potluck, or just feeling lazy, this salad promises to deliver.


Cornbread Panzanella Salad

+ 4 generous cups of cornbread, cut into 1 inch cubes
+ 2 lbs. heirloom tomatoes, chopped into 1-2 inch pieces
+ 1 fresh tropea onion, minced or 1 shallot, peeled and minced
+ 1 or 2 cucumbers, sliced and chopped
+ 5 tablespoons olive oil
+ Sea salt (something flaky like Maldon is best)
+ Frreshly ground pepper
+ 3 tablespoons balsamic vinegar
+ 4-5 oz. good mozzarella, chopped into ½-inch pieces
+ 1/2 cup basil, roughly chopped

1. Lay the cornbread cubes out on a baking sheet and drizzle about 3 tablespoons of olive oil on top. Toss until the pieces are generally covered, and season lightly with salt and pepper. Bake in a 400° oven for 10 minutes, gently stirring once or twice, until toasted.
2. In a large serving bowl, mix the tomatoes, onions or shallots, cucumbers, vinegar, remaining olive oil, and cheese. Add cornbread cubes and mozzarella, some salt and pepper, and toss.
3. Let sit for 20 minutes or so, then serve.

Note: This recipe originally appeared on RuralIntelligence.com on August 10, 2015. It's been back-dated here on our blog so that it falls, seasonally, in the right place. 

7/13/15

Recipe: Northern Thai-style Pork Shoulder

We’ve probably already mentioned that we’re on a tasty journey through the varied flavors of the Asian continent – because, well, it’s all we can talk about! And in the last couple weeks, we’ve really dug into Thai cuisine. There’s just something about the combination of spicy Thai peppers and cooling herbs that tastes so perfect on the almost tropical evenings we’ve been enduring this summer.

Our recent efforts have been ever-more rewarding, as we now have a Thai expert at our disposal — our brother, Will. Will is a natural builder and spent six months living in Thailand… but this summer he’s become our official taste-tester. When he says our kitchen smells like a Thai food market, we know we’ve hit a recipe on its head.

This month we wanted to tackle a dish that we tasted at Andy Ricker’s famous Pok Pok Thai restaurant in NYC. It’s a simple but authentic dish of thinly-sliced grilled pork shoulder, marinated in a paste of cilantro roots, garlic and soy sauce, served with greens and rice. It is a perfect summer dish, and except for some fish sauce, it calls for no unusual ingredients.

Northern Thai-style Pork Shoulder
From Pok Pok

For the pork:
+ 1 lb. pork shoulder
+ 4 cloves garlic
+ Roots from 1 bunch cilantro (if you can’t get some with the roots, use the greens instead)
+ 1 tbsp whole black peppercorns
+ 2 tbsp sugar
+ 4 tbsp Shoyu soy sauce (or another light soy sauce)

1. Pound garlic, cilantro roots and peppercorns together in a mortar and pestle or mix ingredients in a food processor. Either way, you’re going for a paste.
2. Cut shoulder meat into 1/2-inch thick slices. Rub paste onto the meat and marinate for an hour.
3. Grill the meat over a medium heat for 4 minutes on each side.

For the dipping sauce:
+ 2 tbsp minced garlic
+ 1 tbsp red chili pepper flakes
+ 3 tbsp fish sauce
+ 3 tbsp lime juice
+ 2 tsp sugar
+ 4 tbsp cilantro, finely chopped

Mix all together in bowl and serve along side grilled meat. Serve meat and sauce with bibb lettuce leaves or bok choy leaves and rice.

Note: This recipe originally appeared on RuralIntelligence.com on July 13, 2015. It's been back-dated here on our blog so that it falls, seasonally, in the right place. 

6/15/15

Recipe: Strawberry Icebox Pie

If ramps are the first taste of spring, then strawberries are most certainly the first taste of summer. Each year as we take our first bite of our first strawberry, a sense of joyous relief falls over us and we know that summer is truly here. But like all good things in life, strawberry season goes by in a flash, and it's up to us to make the most of it.

We wanted to celebrate this limited-time-only, ruby-red harvest this week, but when we sat down to work out the recipe, we had no idea where to start. There are just so many delicious, delectable, delightful ways to eat strawberries! Our favorite, of course, is to eat 'em as you pick 'em - but that's not much of a recipe. Other dishes on the list? Strawberry rhubarb pie, strawberry jam, strawberries and cream, strawberries and ice cream, strawberry pancakes, strawberry shortcake... you can imagine it's a very long list.

Anyway, rather than pick just one, we decided to pile as many strawberry preparations as we could into one pie plate, and here's where we landed – Strawberry Icebox Pie. There's something for everyone, and a little bit of everything for us – graham cracker crust, jam, mousse, cream and fresh berries. It looks like a lot of work, but it's not – we promise! And it's worth it. So, so worth it! 

 
Strawberry Icebox Pie
Crust:
+ 15 graham crackers (about 1 ½ cups when crushed)
+ ¾ stick butter, melted
+ 1/3 cup sugar
+ 1 tsp salt

Jam Layer:
+ 1 lb. strawberries, hulled
+ 1⁄3 cup sugar
+ 1 1/2 tablespoons cornstarch

Mousse Layer: 
+ 1 lb. strawberries, hulled
+ 1⁄2 cup sugar
+ 1⁄2 tbsp. lemon juice
+ 1⁄2 tsp. salt
+ 3 eggs, separated into yolks and whites
+ 1 cup heavy cream
+ 1 1⁄2 tsp. vanilla extract

Whipped Cream:
+ 1 cup heavy cream
+ 2 tbsp sugar

Directions:

To make the crust:
1. Preheat oven to 350°.
2. Crush the graham crackers. A food processor is the easiest way, but you can also put the crackers in a heavy zip-lock bag, wrap the bag in a dishtowel, and whack away at it with a rolling pin.
3. Mix all crust ingredients until well-combined. Dump into a buttered 9-inch pie pan or spring-form pan and press firmly onto the bottom and up the sides. (If using a spring form pan, lay parchment paper in the bottom and then butter.)
4. Bake for 10 minutes. Set pan on wire rack to cool.

To make the jam layer:
1. Chop about half of the strawberries into 1/2-inch pieces. Set aside.
2. Put remaining strawberries in a medium saucepan and crush them using a fork. Add sugar and cornstarch to the pan and cook over medium-low heat until mixture comes to a boil.
3. Remove from heat and stir in remaining chopped strawberries. Cool completely.
4. Spread cooled jam in the bottom of the cooled crust. If your jam seems very watery, use a slotted spoon and transfer only the chunky parts. Refrigerate the whole thing – crust and jam - or put in the freezer until cool.

To make the mousse layer:
1. Puree strawberries in a blender or food processor until smooth and transfer to a large saucepan. Add sugar, lemon juice, salt, and egg yolks, then whisk until smooth. Put the saucepan over medium heat and bring to a simmer.
2. Cook, whisking occasionally, for about 15 minutes, or until the mixture has thickened a little. Remove from heat, allow to cool for 10 minutes, then put in the refrigerator until cold – about 30 minutes.
3. Whisk egg whites in a bowl until stiff peaks form and add to cooled strawberry mixture. Fold gently until combined then set aside.
4. Whisk cream and vanilla in a clean bowl until stiff peaks form, add to strawberry mixture. Fold until combined then gently pour into pan, layering on top of cooled jam.
5. Refrigerate the pie or put in the freezer until the mousse sets a bit.

To make the whipped cream:
1. Mix cream and sugar in a bowl. Whip until firm peaks form. Spread over mouse layer. Put in the freezer for a few hours or overnight. One hour before serving, take the cake out of freezer if you're using a spring form pan, release it now) and put in the fridge to thaw slowly. Before serving, top with strawberries.

Note: This recipe originally appeared on RuralIntelligence.com on June 15, 2015. It's been back-dated here on our blog so that it falls, seasonally, in the right place.

5/11/15

Recipe: Chive & Cheddar Biscuits

It seems like, since our first date, we’ve been talking about taking a food-centric road trip through the South… and we finally made it! A month or so ago, we ate our way into Savannah, then through Charleston and finally, on to Asheville. Of course, we didn’t see and consume everything we wanted to, but it was a pretty good start. 


There are many things that drew us to the south - chief among them, a restaurant in Charleston led by one of our favorite chefs, Sean Brock - but we were surprised by how much we loved the Low Country of South Carolina. We immediately connected with the lush and swampy landscape, the culture, and yes, the food! Biscuits! Smoked pork! Cheese! Grits! Butter, butter and more butter! We wished we could take it all home with us. 


When we arrived back in The Berkshires, our belts a little tighter, spring was barely emerging. Not much was happening in the garden beds except our trusty chives, which had sprung up high as if to welcome us home. Yearning for a taste of our travels, we set to work putting together a reminiscent dish, but with locally-sourced ingredients: Chive and Cheddar Biscuits, with North Plain Farm bacon and eggs. It might be a while until we make it back to the low country, but until then, this hearty breakfast will keep up sated. 

Chive & Cheddar Biscuits

+ 2 ¼ cups cake flour
+ 2 teaspoon sugar
+ 1 tablespoon baking powder
+ ¾ teaspoon salt
+ ¾ teaspoon baking soda
+ 9 tablespoons salted butter, cut into small chunks and frozen for a few minutes
+ 1 cup shredded cheddar cheese
+ ⅓ cup chopped chives
+ ¾ cup buttermilk
+ egg wash (1 egg, whisked together with 1 tsp water)

1. Preheat oven to 400 °F and cover a baking sheet with a layer of parchment paper.
2. Combine flour, sugar, baking powder, baking soda and salt in a large bowl. Working quickly and gently, use your fingertips or a pastry blender to work the butter into the dry ingredients until the butter is broken into pea-sized pieces. When it’s done, it will resemble a very coarse meal. Add the shredded cheese and chives and stir until combined.
3. Add the buttermilk and stir until clumps form. Knead the mixture gently until it just holds together.
4. Dump the dough on to a floured surface and pat into a rectangle, about ¾ inch thick. At this point, you can either cut the rectangle into smaller 3 inch-ish segments or cut 2-3 inch rounds with a biscuit cutter. Either way, transfer to the baking sheet, leaving about 2 inches in between biscuits.
5. Lightly brush egg wash on top of biscuits and put into oven. Bake for 15 minutes, until biscuits are golden brown on top. Serve immediately.

Note: This recipe originally appeared on RuralIntelligence.com on May 11, 2015. It's been back-dated here on our blog so that it falls, seasonally, in the right place.

4/17/15

Recipe: Kimchi Pancakes

This winter we promised ourselves that we’d spend some time getting to know the various cuisines of Asia. (We thought we’d make a resolution we could actually keep this year!) We researched renowned books from all the leading traditional and up-and-coming chefs, and went to work exploring new techniques, flavor profiles and ingredients.

As we’ve moved through each country and region, we’ve slowly accumulated a pantry full of kitchen staples from cuisines around the continent - and we’ve been pleasantly surprised by how many locally produced options there are for us to experiment with. Now we always have at least one variety of South River Miso in our fridge - usually hearty brown rice - along with a couple of bottles of Kitchen Garden’s sriracha. We’ve also bulked up on Korean chili flakes and garlic powder from Yung Yuk of Et Cetera Farm in Hillsdale, NY and of course, we’re never without a few jars of Hosta Hill kimchi.


Hosta Hill kimchi has always been in our fridge, long before this continental cooking kick. Our Sunday morning breakfasts often consist of a fried egg, some left over rice or noodles and big, hearty scoop of kimchi right on top. But recently we’ve really been plowing through it; in kimchi and pork stew, along side miso glazed haddock, finishing off tatsoi stir fry, you get the idea.

These kimchi pancakes are one of our favorite new discoveries. Serve them as a side with marinated steak and sauteed greens, or pile them high and give them the spotlight.


Kimchi Pancakes
Makes 8 pancakes

+ 2 cups cabbage kimchi (or one full jar of Hosta Hill)
+ 1/2 cups all-purpose flour
+ 1/2 cups rice flour
+ 1 teaspoon kosher salt
+ 4 scallions, finely chopped
+ Vegetable oil - we used Safflower


1. Drain the kimchi, reserving the juice. Get in there with your hands and squeeze out the liquid. Measure the juice and top off with water if needed to make 1 cup. Coarsely chop the kimchi and set aside.
2. In a large bowl, mix together the flours, salt, and kimchi juice. Let the mixture stand for 10 minutes then stir in the chopped kimchi and scallions.
3. Heat a large skillet over medium-high heat with a tablespoon of oil. For each pancake, add about a third of a cup of the mixture to the skillet and spread it out with the back of a spoon. Cook until the bottom is crispy and golden, about 2 minutes. Flip over and cook until the other side is crispy and golden, about 2 more minutes. Remove from skillet and drain on towels. Continue in batches.

Serve the pancakes warm with a simple dipping sauce on the side. Here’s a recipe we really like, and it makes just enough sauce for one batch of pancakes.

Dipping Sauce
Combine in a small bowl:

+ 3 tablespoons soy sauce
+ 1 tablespoon toasted sesame oil
+ 1/2 teaspoon rice vinegar
+ 2 teaspoons toasted sesame seeds, crushed or whole
+ 1/2 teaspoon sugar or honey
+ 1 clove garlic, crushed
+ 1 scallion, chopped

Both recipes adapted from TheKitchn.com

Note: This recipe originally appeared on RuralIntelligence.com on April 13, 2015. It's been back-dated here on our blog so that it falls, seasonally, in the right place.  

3/15/15

Recipe: Cumin-roasted Carrots with Yogurt Sauce

Once a meat‪-‬centric household‪,‬ since Jake has became Produce Manager at The Coop we’ve really learned to enjoy experimenting with the ever-expanding selection of local fruits and vegetables. The growers themselves have been a source of seemingly infinite inspiration, which we’ve bolstered by devouring the writings of our favorite veg-centric chefs.

One chef and writer who has particularly shaped our understanding of produce is Deborah Madison. In her tome, Vegetable Literacy, she provides an outline for unexpected yet harmonious flavor combinations and it has completely changed the way we think about cooking.

Yotam Ottolenghi’s books, Plenty and Plenty More have been another favorite source of inspiration. As we slowly work our way through the recipes – they all look so good, how do you choose?! – we’ve learned to embrace the power of spices thanks to his bold, Middle Eastern-inspired flavors.

For our most recent effort, we reached for one of the few remaining, not-brown, late-late-late winter vegetables. With a multi-colored medley of carrots from Winter Moon Roots as our base, and Madison as our guide, we added depth by sprinkling cumin and coriander over top. For brightness we looked to citrus, which has a long track record of pairing well with carrots, and to bring out some sweetness, we threw everything in a roasting pan with a little local honey. Finally, taking a page from Ottolenghi’s book, we topped it off with a tangy goat yogurt sauce flavored with cumin and lemon.

Not revolutionary flavor combinations, but tried and true… and hard to beat. Served over a bed of greens like arugula or parsley, or on top of a hearty grain like faro or couscous, this is a dish that could easily take center stage in a vegetarian meal. But it would be just as happy as a complementary side dish to a flavorful leg of lamb.

Cumin Roasted Carrots with Yogurt Sauce

1½ pounds carrots, peeled and cut approximately 5 inches long and 1/2 inch wide

Blood-orange dressing:
+ 1 cup blood orange juice (1-2 blood oranges)
+ 1 tablespoon soy sauce
+ 1 tablespoon honey
+ 1/3 cup extra-virgin olive oil
+ 1/2 tsp ground cumin
+ 1/2 tsp ground coriander

Cumin yogurt sauce:
+ 1 cup goat yogurt
+ 1 tablespoon Meyer lemon juice
+ 2 teaspoons ground cumin
+ pinch kosher salt

1. Preheat oven to 400 degrees.
2. Place carrots in a baking dish. Whisk together dressing ingredients and pour over carrots, tossing to make sure the carrots are completely coated.
3. Roast for 30-45 minutes, until carrots are tender and caramelized.
4. While the carrots are cooking, whisk together the yogurt sauce ingredients.
5. Once cooked, plate the carrots – on their own, with greens or a hearty grain – and drizzle yogurt sauce over top. Enjoy!

Note: This recipe originally appeared on RuralIntelligence.com on March 15, 2015. It's been back-dated here on our blog so that it falls, seasonally, in the right place.   

12/7/14

Recipe: Perfecto Meatballs

The poor meatball. So often relegated to childrens’ menus and questionable smorgasbords at discount furniture chains, the meatball is rarely given a real chance to shine. But we know the truth – that with the right ingredients and a little respect, meatballs can be complex, delicate, immensely satisfying and borderline elegant. 

Clearly, we are a family of meatball enthusiasts, from Middle Eastern kofta, heavy with green herbs and deep spices to dreamy Swedish köttbullar, smothered in peppery cream sauce. And, of course, there’s the classic Italian-American; three meats, breadcrumbs, and some parmesan, all rolled into a covetable package. Jake has perfected his version which, when sauteed in just enough butter (a lot), and finished off in a pan of saucy tomatoes, manages to couple a toothsome crust and a melt-in-your-mouth center. Poured over a bowl of bucatini or creamy polenta, this classic peasant dish will make you feel like well-fed royalty.

Perfecto Meatballs

Make the meatballs:
+ ½ cup milk
+ ½ cup bread crumbs
+ 2 eggs
+ 2 tbsp parmesan
+ ½ lb veal
+ ½ lb beef
+ ½ lb hot Italian pork sausage
+ 2 tbsp olive oil
+ 2 tbsp butter

1. Combine milk and bread crumbs in a small bowl until the all of the milk is absorbed.
2. In a large bowl, use your hands to mix the three meats with the eggs, parmesan, and bread and milk mixture. Make sure it is well blended but don’t over mix, as the meatballs will lose their fluffiness.
3. Place a large saute pan on high heat with the oil and butter.

4. Form the meat mixture into 1.5 – 2 inch rounds, and brown in small batches. Do not overcrowd pan.
5. Brown meatballs until they have a deep brown crusty exterior, a couple minutes on each side. One whole batch should take about 5-7 minutes – the balls don’t need to be 100 percent cooked at this point. When done, put meatballs aside.

Make the sauce:
+ (2) 28 oz. cans of whole peeled tomatoes
+ 2 medium yellow onions, chopped
+ 6 cloves of garlic, peeled and chopped

1. Using the drippings from the meatballs, saute the onions and garlic in the same pan until translucent, about 5 minutes.
2. Add tomatoes, roughly crushing each tomato with your hand or a large wooden spoon.
3. Bring sauce to a boil and then turn the heat down to a simmer. Simmer for 45 minutes, stirring occasionally.

4. Add the meatballs back into the sauce and cook for another 15 minutes.
5. Pour over pasta or polenta and serve with some grated parmesan and pepper.


Note: This recipe originally appeared on RuralIntelligence.com on Dec 7, 2014. It's been back-dated here on our blog so that it falls, seasonally, in the right place.   

8/17/14

Recipe: Corn and Jalapeño Fritters

Nobody’s perfect all the time. We do our best to stick to a seasonal produce schedule, buying locally when we can and often amending recipes or changing culinary tacks when we can’t. But there’s one night, almost weekly, when we fill our grocery carts with abandon, and that’s taco night.

Sure, we do our best. We buy our steak from North Plain Farm and our radishes, cabbage, tomatoes, even jalapeños, from farms around the county. But we just can’t let go of our beloved guacamole, and the avocados and limes that it calls for. It’s a deliciously rebellious treat that we relish—so much so that we often over-buy for our table of two and happily gorge on leftovers for a few extra days.

But we’re always striving to bring it back to the Berkshires. The last couple taco nights we’ve been enjoying these delicious and easy corn fritters. They’re a quick way to get a little more local produce on our plates, and a great off-the-cob vehicle for the corn which is so bountiful and sweet this year. Serve with lime, avo and creme fraiche as a starter, or skip the tortillas all together and pile your taco fillings on top, torta-style. However you do it, you’ll be doing your local farmer a favor while enjoying more global flavor.

Corn and Jalapeño Fritters

+ 2 beaten large eggs
+ 1/4 cup all-purpose flour
+ 2 tablespoons grated Parmesan
+ 1 teaspoon kosher salt
+ 2 cups fresh corn kernels
+ 1 thinly sliced scallion
+ 1 finely chopped seeded jalapeño
+ 2 tablespoons safflower oil (canola will work, too)
+ Flake salt
+ Creme fraiche, avocado and lime, for serving

1. Combine eggs, flour, grated Parmesan, and kosher salt in a food processor. Pulse a few times to mix well.
2. Add corn kernels, scallion, and jalapeño; pulse 2–3 times.
3. Heat oil in pan. When hot, cook heaping tablespoonfuls of batter until golden brown, about 4 minutes per side. Season patties with flake salt and serve with creme fraiche, avocado and lime.

Note: This recipe originally appeared on RuralIntelligence.com on August 17, 2014. It's been back-dated here on our blog so that it falls, seasonally, in the right place. 

7/21/14

Recipe: Currant Syrup + Cosmo

Given our particular affinity for berries, we are lucky to have inherited Jake’s grandmother’s home surrounded by raspberry, currant and gooseberry bushes. This year we added to the patch with hearty low and high-bush blueberries, lingonberries, huckleberries and elderberries sourced from Project Native. And now, we’re smack-dab in the middle of high berry season, with perfectly ripe blueberries, raspberries, currants and gooseberries shouting out for our attention.

Most evenings before dinner, we grab a container and go out to mine our precious jewels from their shrubs. Snacking as we go, we never seem to tire of foraging from own backyard. What makes it back inside is often gobbled up that evening as is, by the handful. Occasionally, with a little extra time and energy, we’ll spoon them over biscuits with cream.

No matter how fast we chomp, though, we always get to a point where we cant keep up with the supply and we have to start preserving. One of our favorite ways to prolong our enjoyment is by making syrups. They are a super-quick and incredibly versatile way to stretch the season — and super yummy as a base for cocktails. Here’s our recipe for a simple currant syrup, which is just as good in a currant Cosmo as it is over vanilla ice cream.

Currant Syrup
+ 2 cups currants
+ 2/3 cup water
+ 4 tablespoons sugar

1. Place all of the ingredients in a small pot and bring to a boil.
2. Once the berries have reached a hard boil, turn down to a gentle simmer and walk away for 30 minutes.
3. Strain the syrup into a jar and, with a spoon, push the remains of the berries through the sieve.

Currant Cosmo
+ 2 oz. vodka
+ 2 oz. currant syrup
+ 1 oz. vermouth
+ juice of one lime

1. Combine ingredients together in a cocktail shaker, shake until cold, and serve with a lime wedge or fresh berries.

Note: This recipe originally appeared on RuralIntelligence.com on July 21, 2014. It's been back-dated here on our blog so that it falls, seasonally, in the right place.